Mount the Hard Disk
Required Components
TS-7 Pro Screen
2.5” Hard Disk (Self-provided)
Raspberry Pi 4(Self-provided)
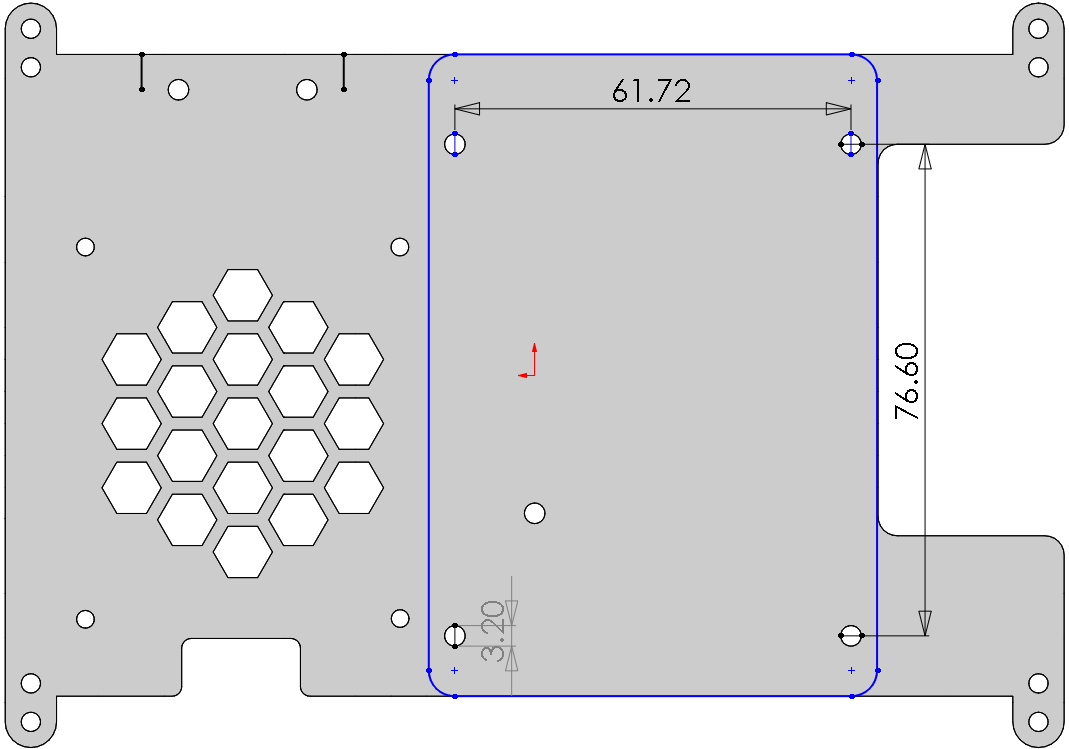
Hole size for mounting the hard disk:
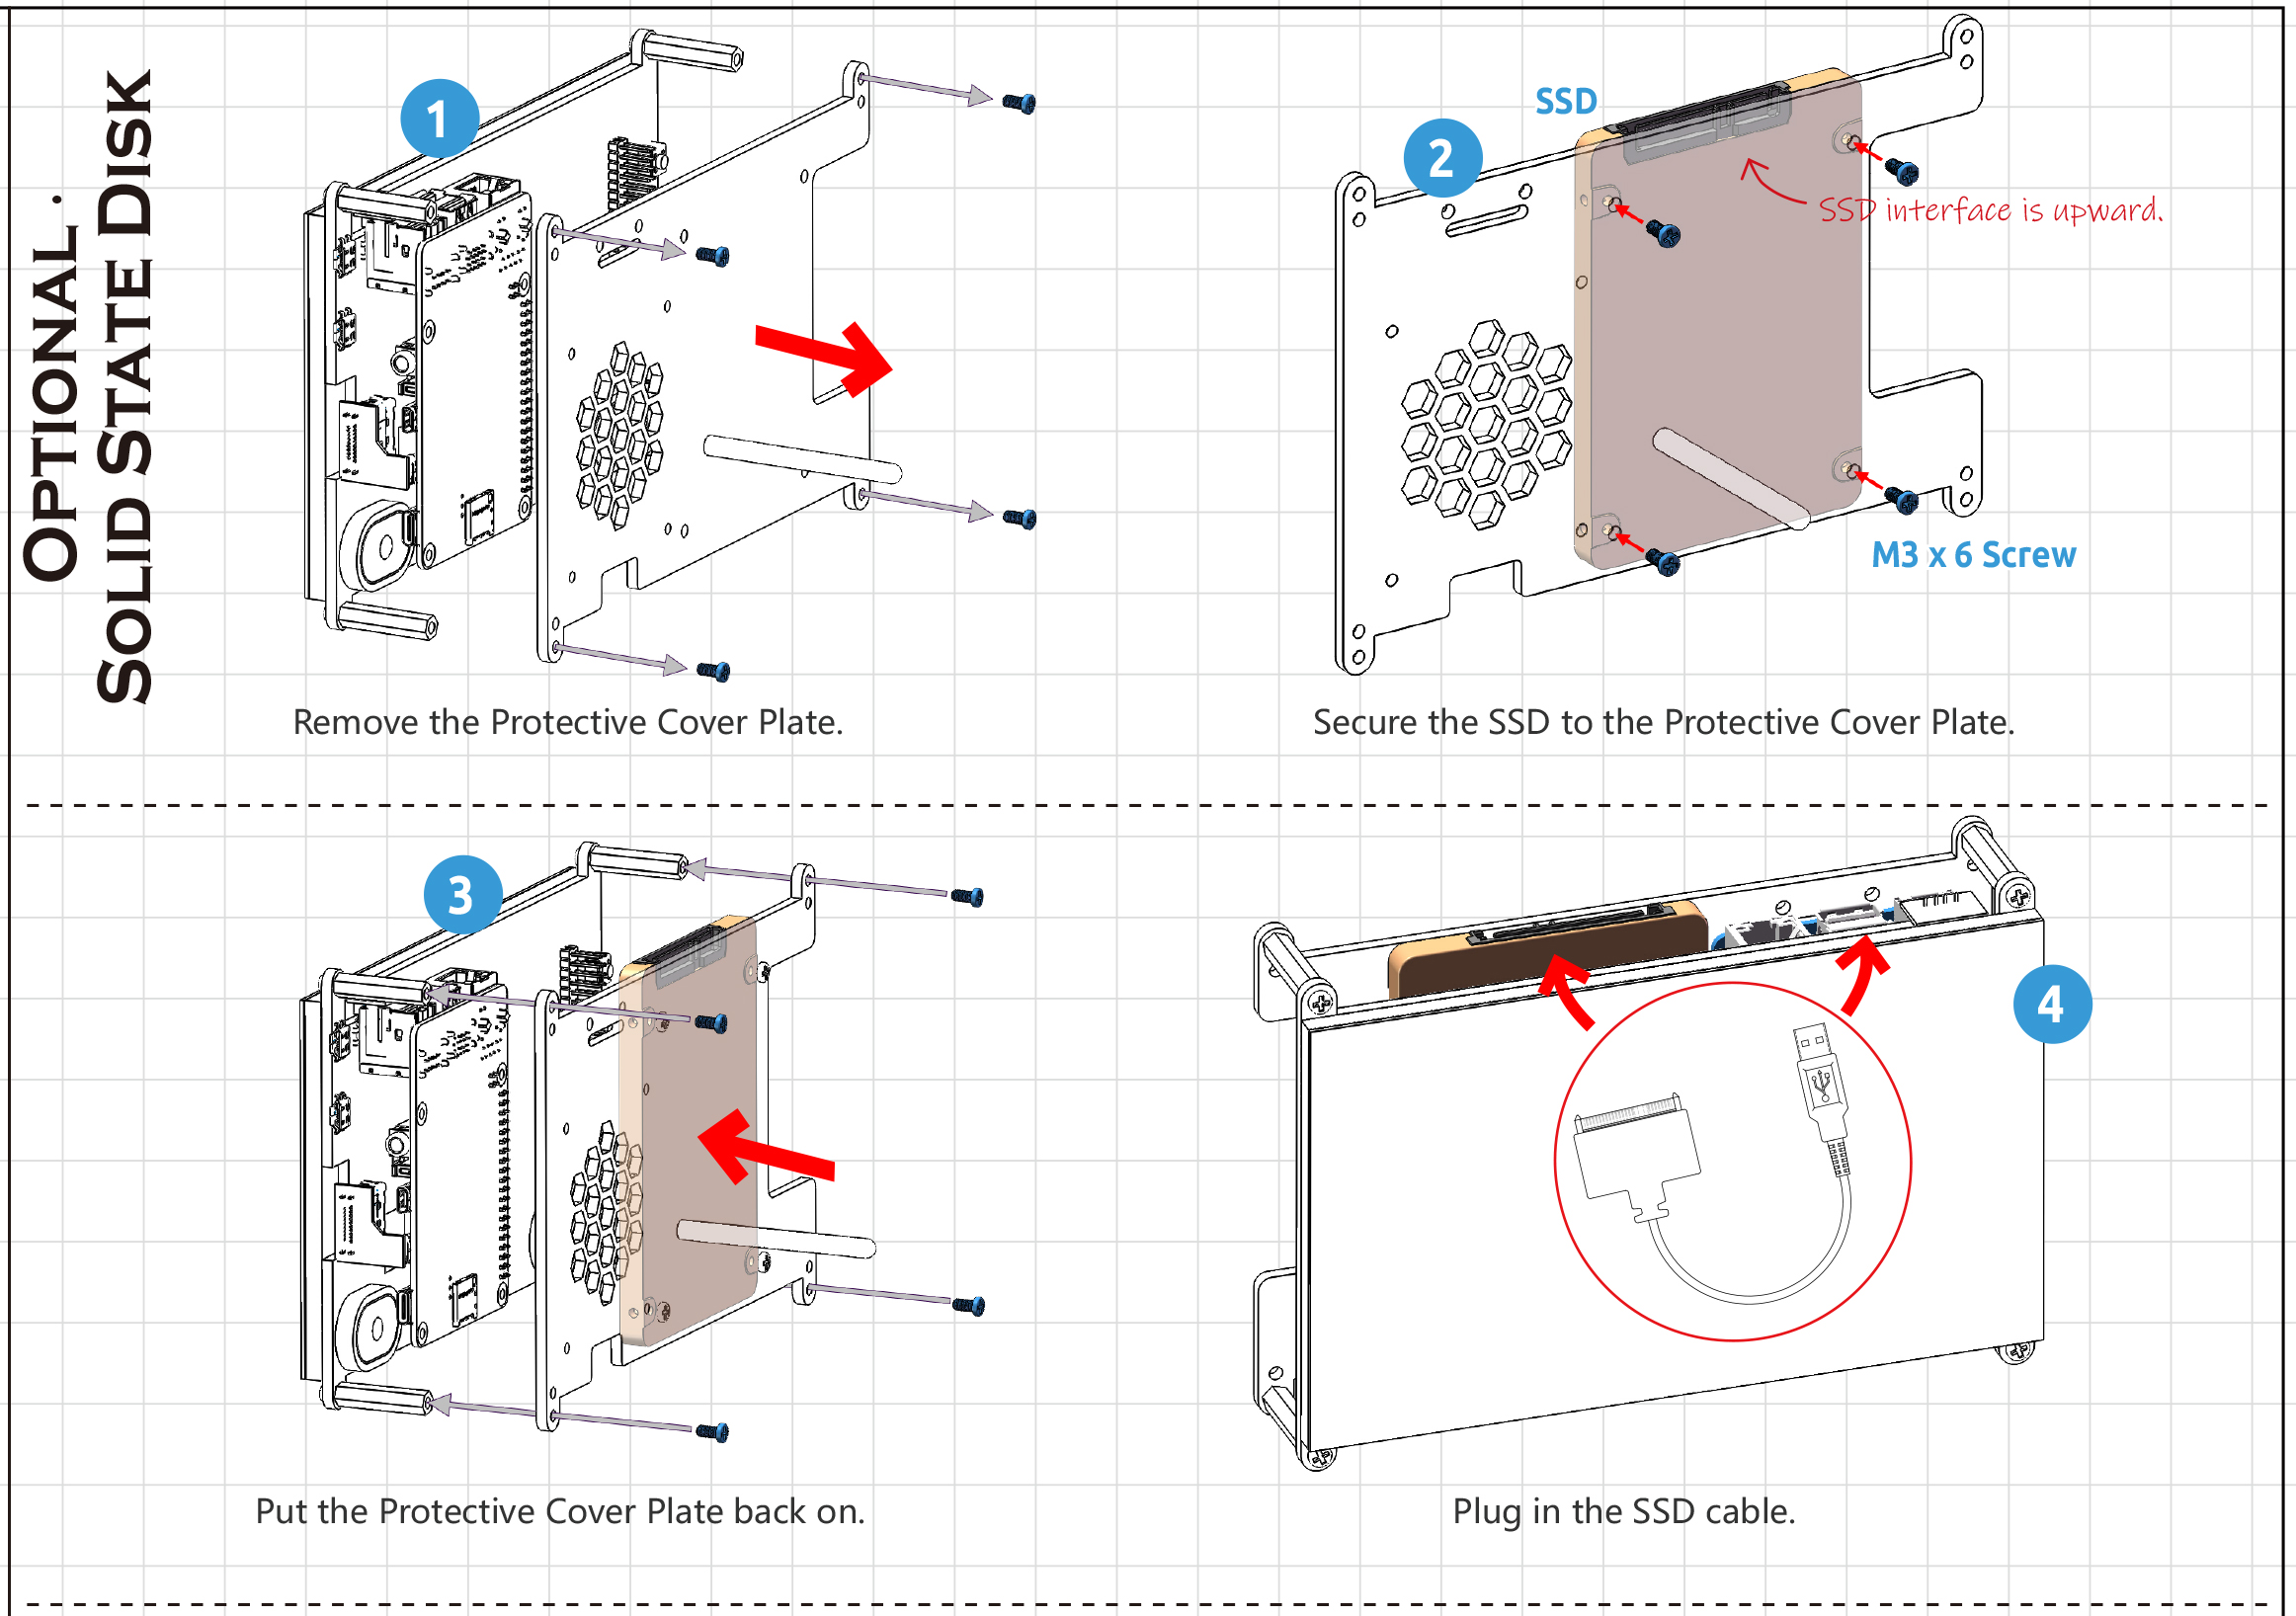
Assemble the Hard Disk
Follow the tutorial below to mount the Hard Disk on the TS7-Pro Screen.
Booting RPi from Hard Disk
To boot Raspberry Pi with Hard Disk, you need to update the Bootloader of Raspberry Pi, then install Raspberry Pi OS on Hard Disk, and finally reboot Raspberry Pi and Hard Disk.
You have 2 methods.
Using Raspberry Pi Imager: This method is recommended for newbies, it is easy to operate and less error-prone. But this method will make you lose the contents of your Micro SD card.
Using Commands: For users with basic knowledge, you can use this method if you don’t want to lose the data of your Micro SD card.
Using Raspberry Pi Imager
Download Raspberry Pi Imager.
Select a spare SD card (the data will be erased), then insert it into your computer using the reader.
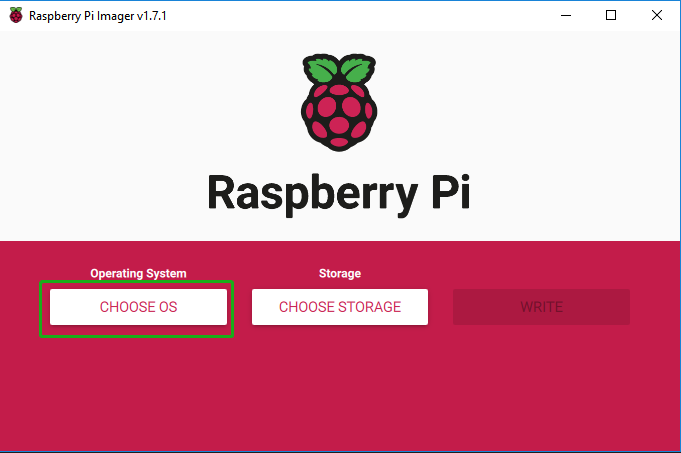
Launch Raspberry Pi Imager and click CHOOSE OS.
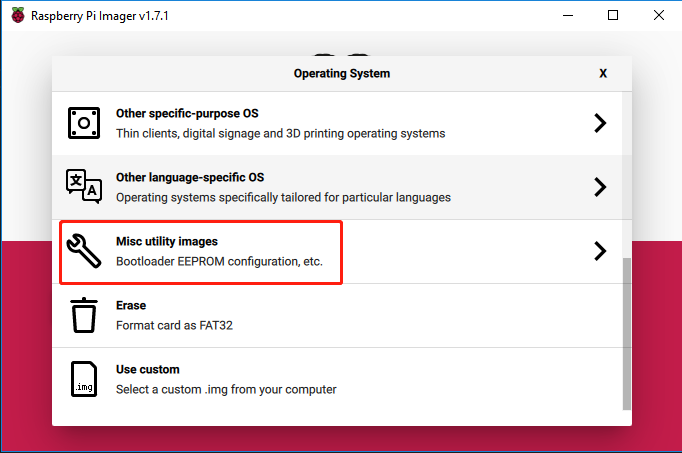
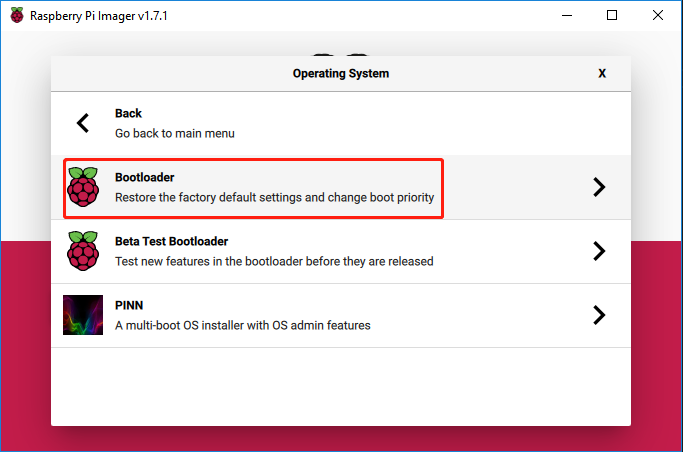
Scroll to the bottom of the page and select Misc utility images.
Select Bootloader.
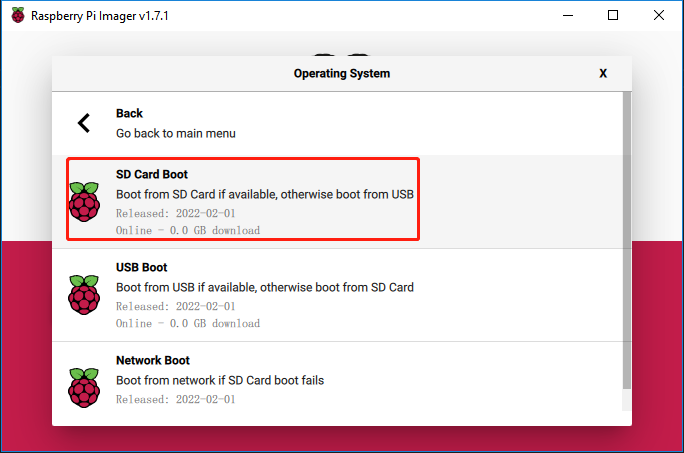
Select a boot-mode, SD card boot is recommended.
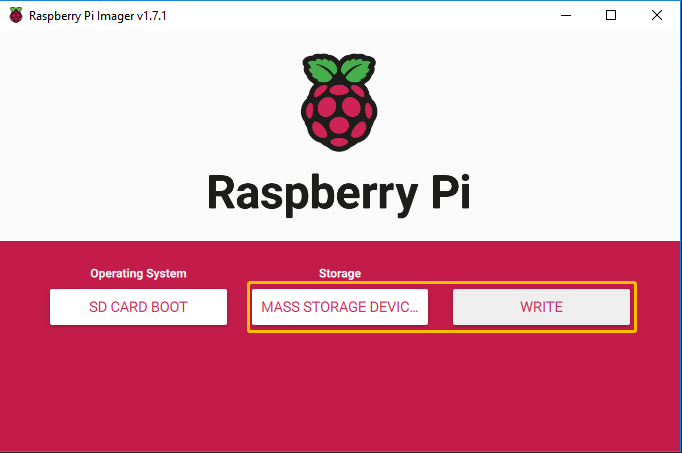
Select SD card and then Write, you will be prompted that all data on this Micro SD card will be erased, so it is recommended to select a spare SD card.
Once the following message appears, you can unplug the card reader from the computer.
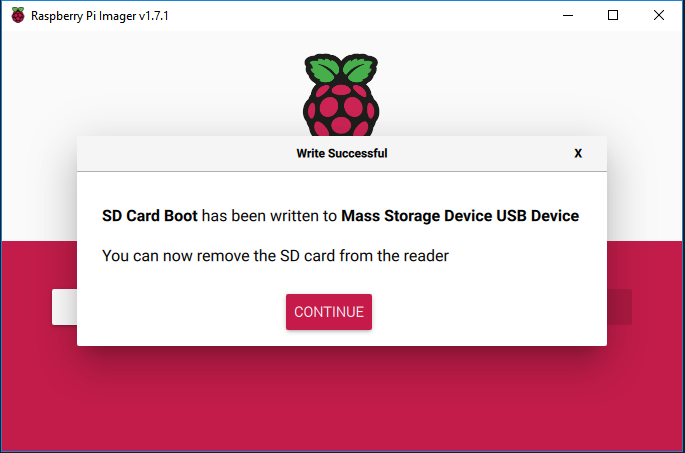
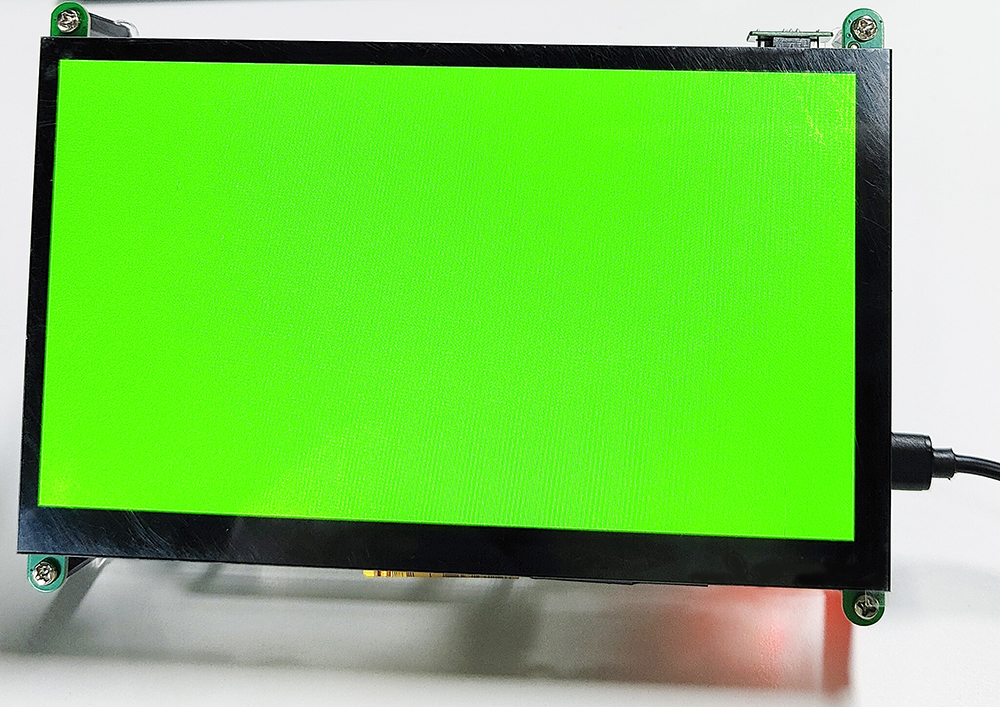
The green activity LED will blink with a steady pattern and the screen will be green on success.
Power off the Raspberry Pi and remove the Micro SD card.
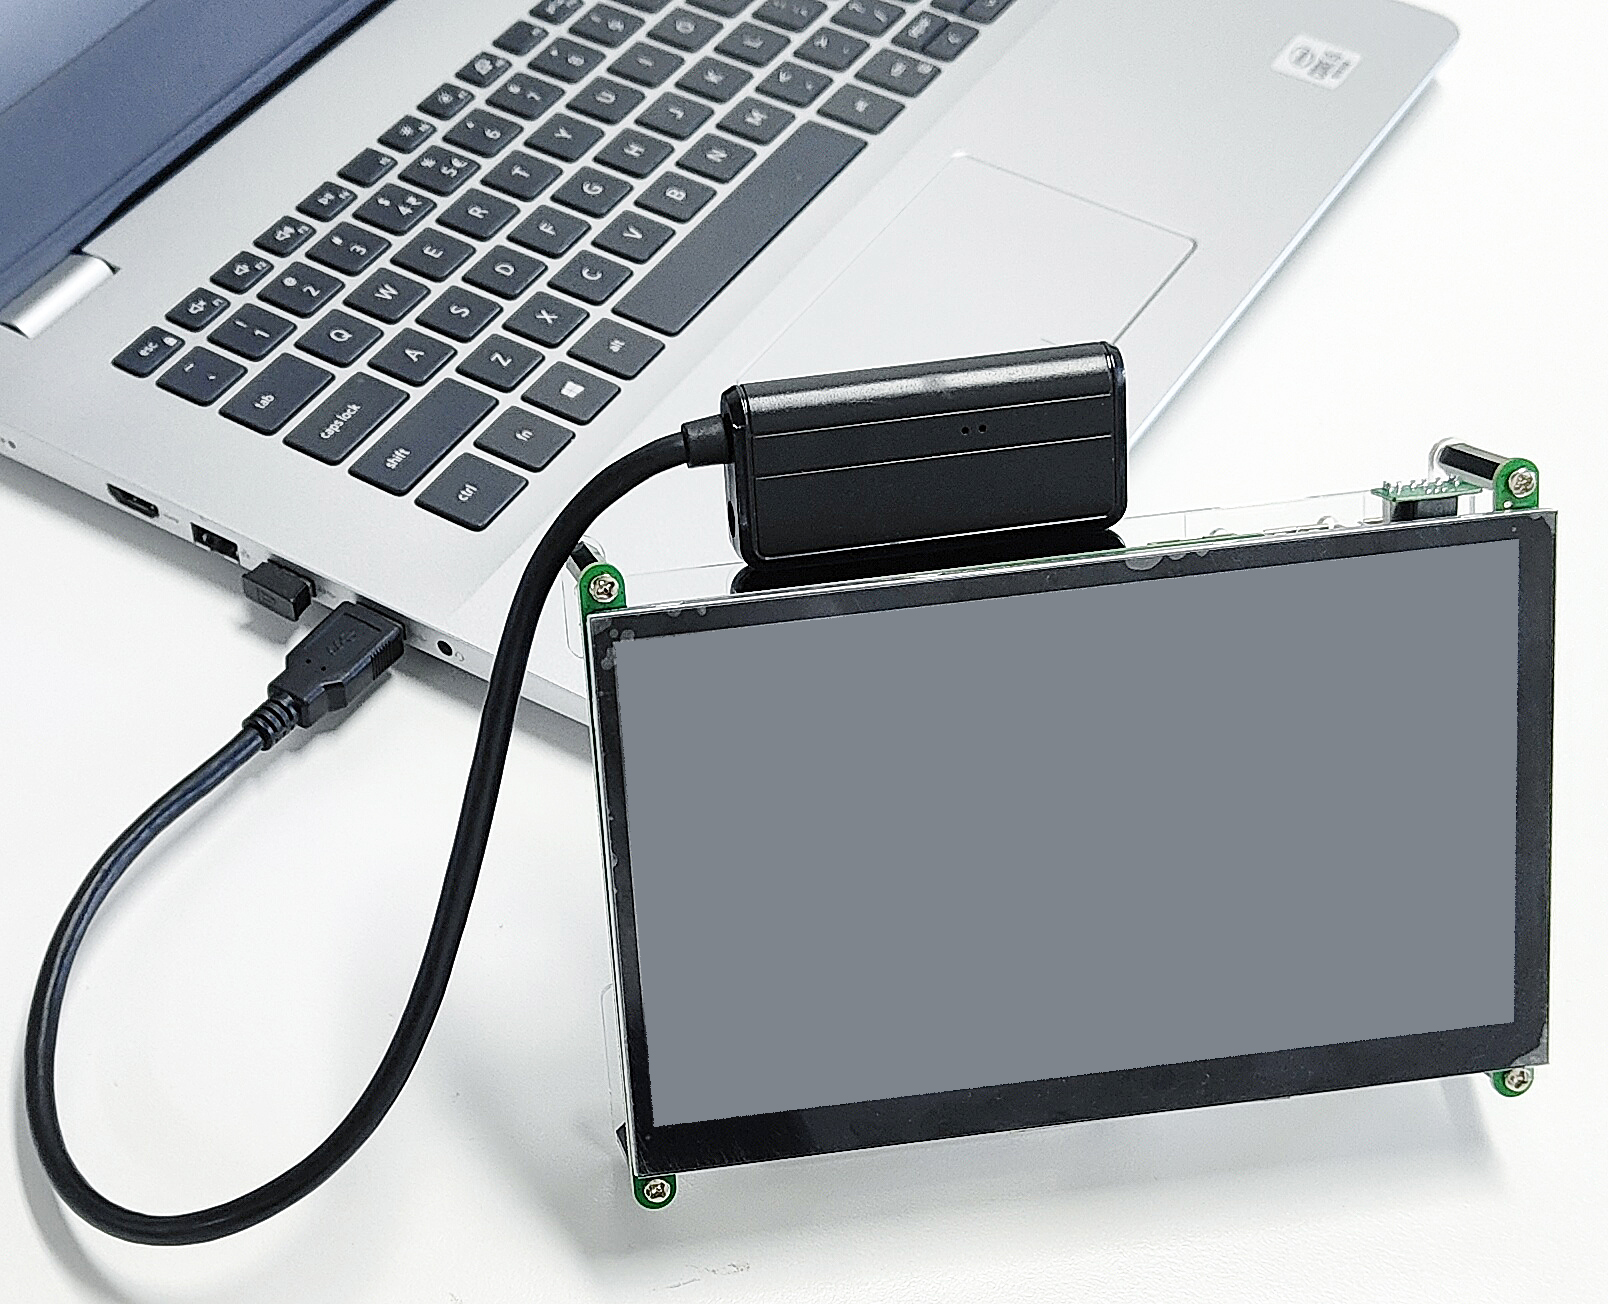
Now to install the Raspberry Pi OS on your hard disk. Connect your hard disk to your computer with the cable that came with the drive.
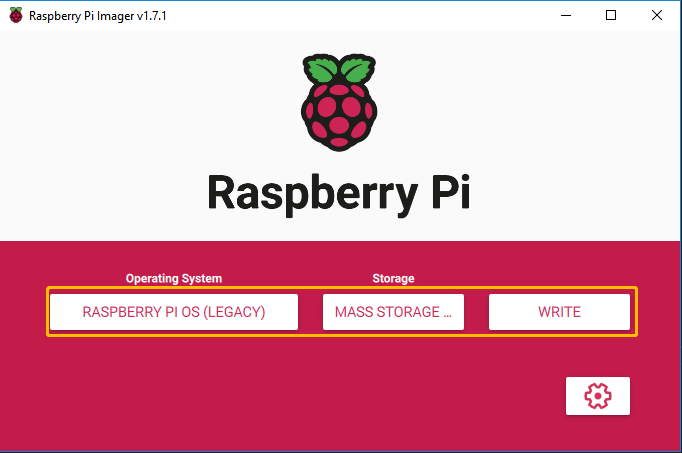
Open the Raspberry Pi Imager, click CHOOSE OS -> Raspberry Pi OS(other) -> Raspberry Pi OS(Legacy).
Note
Of course you can also choose the latest version of Raspberry Pi OS (Debian Bullseye), but Debian Bullseye version will cause some features to not work, so it is recommended to continue using the Debian Buster version.
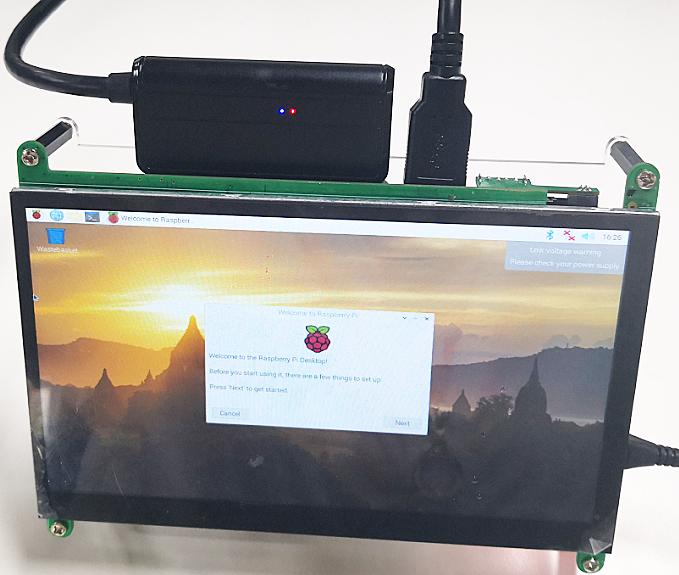
After installation, unplug your hard disk and plug it into the USB port of the Raspberry Pi. Now power up the Raspberry Pi and you will see the Raspberry Pi desktop.
Using Commands
Run the following commands to update Raspberry Pi OS to get the latest version of the rpi-eeprom package.
sudo apt update
sudo apt full-upgrade
Run following command to open the Raspberry Pi Software Configuration Tool.
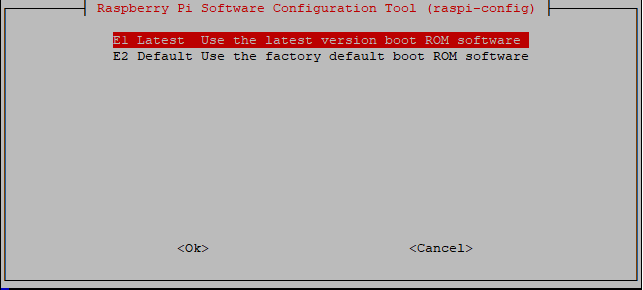
sudo raspi-configSelect Advanced Options -> Bootloader Version
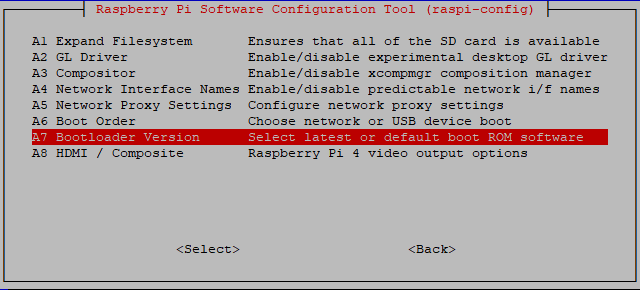
- Select Default for factory default settings or Latest for the latest stable bootloader release.
After rebooting the Raspberry Pi, use the following command to view the name of the storage device.
sudo fdisk -l
Now, clone the system from the Micro SD card. Where
ifis followed by the sd card name andofis followed by the SSD hard drive name.sudo dd if=/dev/mmcblk0 of=/dev/sda bs=4M
After the copy,power off the Raspberry Pi and remove the Micro SD card.
Now power up the Raspberry Pi again and you will see the Raspberry Pi desktop.
You can refer to the official Raspberry Pi tutorial at:
https://www.raspberrypi.com/documentation/computers/raspberry-pi.html#updating-the-bootloader
Warning
If you are trying to get Raspberry Pi 4B to boot from Micro SD card again, but found that it cannot boot and black screen. It may be that the Raspberry Pi is not reading the Micro SD card, you need to follow the tutorial below to change the configuration of the Micro SD card now.
Reinsert the Micro SD card into the computer with a card reader.
Open the
boot/hard drive.Double click on the
cmdline.txtfile to open it.Add
sdhci.debug_quirks2=4at the beginning and then pressspacebar.After saving the changes, remove the Micro SD card from the computer.
After reinserting it into the Raspberry Pi, you will be able to get the Raspberry Pi to reboot.